Step by step guide to connect WhatsApp with CampaignHQ
The advantage of using WhatsApp cloud api integration with CampaignHQ is that you can send WhatsApp messages to your customers and prospects directly from your CampaignHQ account.
Prequestis for WhatsApp cloud api integration with CampaignHQ
Before you can use WhatsApp cloud api integration with CampaignHQ, you must first complete the following steps:
- Phone Number that’s not currently connected with WhatsApp.
- Registered business with some legal document (GST number is mandatory for Indian businesses.)
- Website with privacy policy page.
- Payment method like a credit or debit card.
Step 1. Create an app on the Meta portal.
1. Go to https://developers.facebook.com If you don't have an account with them, please create one and log in to your account. Then click on “My Apps”.
2. Then click on “Create App”
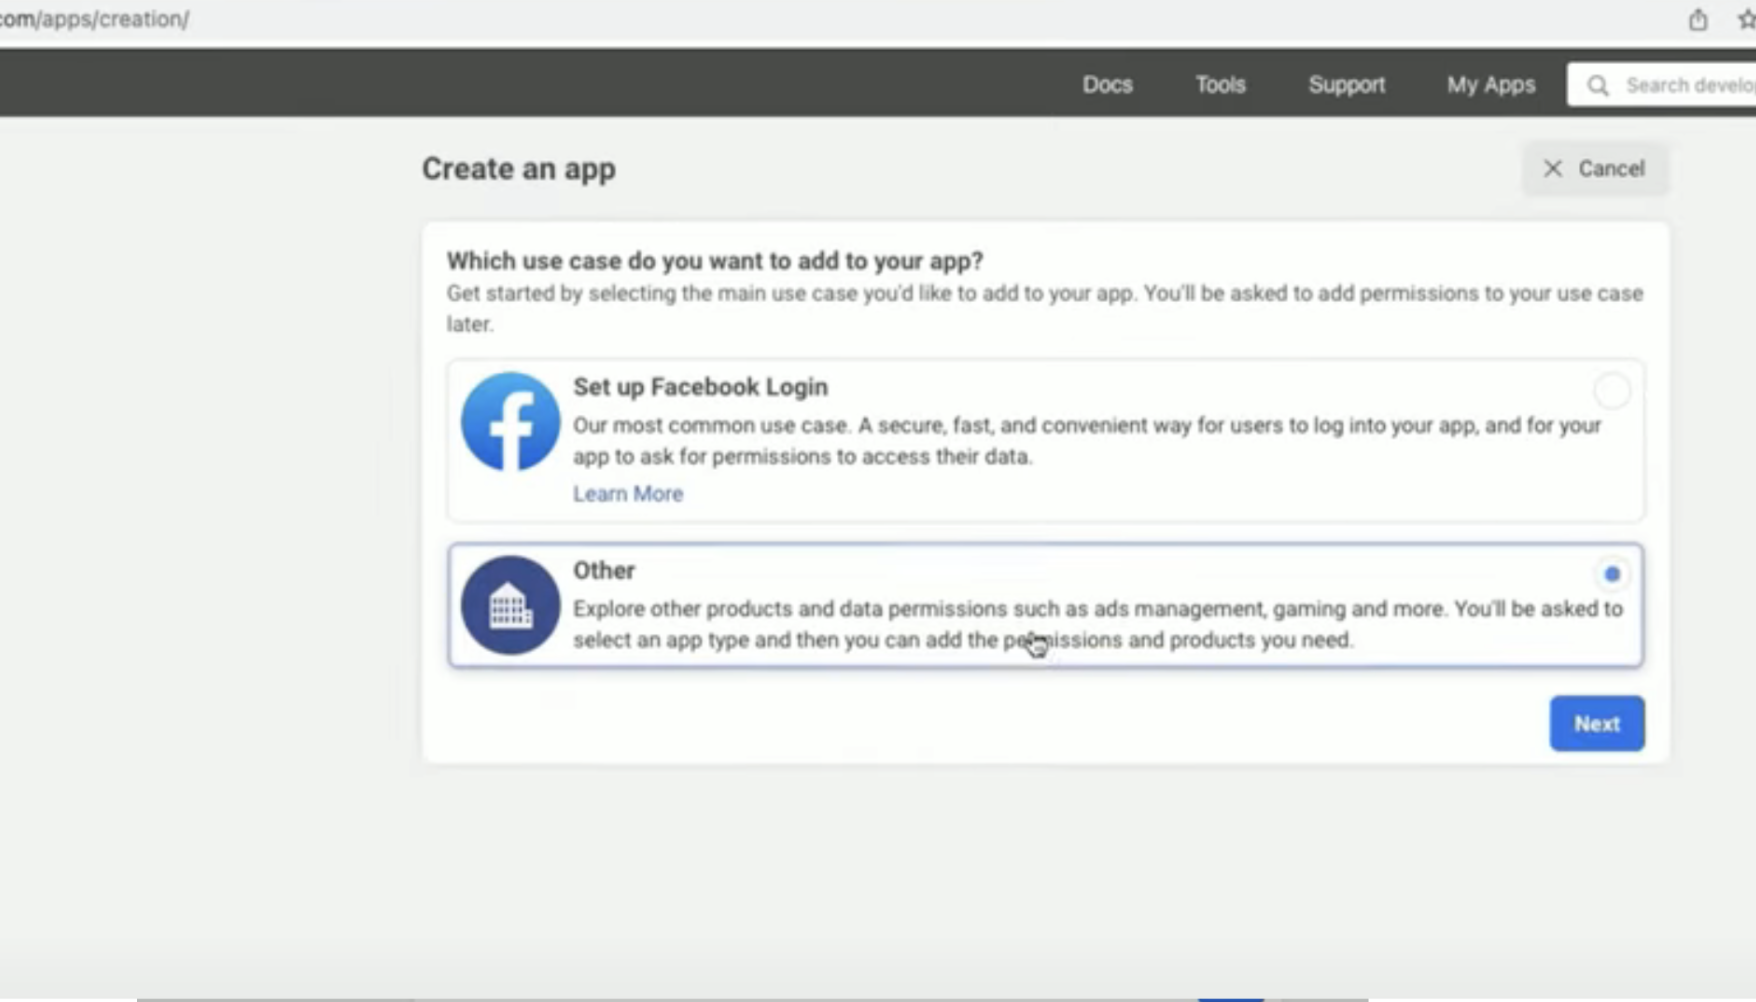
3. Select “Other” as an option for the use case and click on “next”.
4. Then Enter your App Name, Email and You can select a Business account. If you don't have a business account already you can skip this for now. Click on Create App.

5. Click on WhatsApp “Set up”. Then you can select a business account if you have any or you can select “Create a business account”. Then click continue


Step 2. Add your phone number
a. Click on API setup

b. On this page, click on “Add phone number” at the bottom

c. Here you add your business name, website and country. Then click “Next”

d. Now you put your display name here, select your timezone, category and click on Next

e. Now select your country code and enter your number. Then click on Next. And verify your number.

Step 3. Configure webhooks
a. Go to Configuration. Then click on the Edit button.

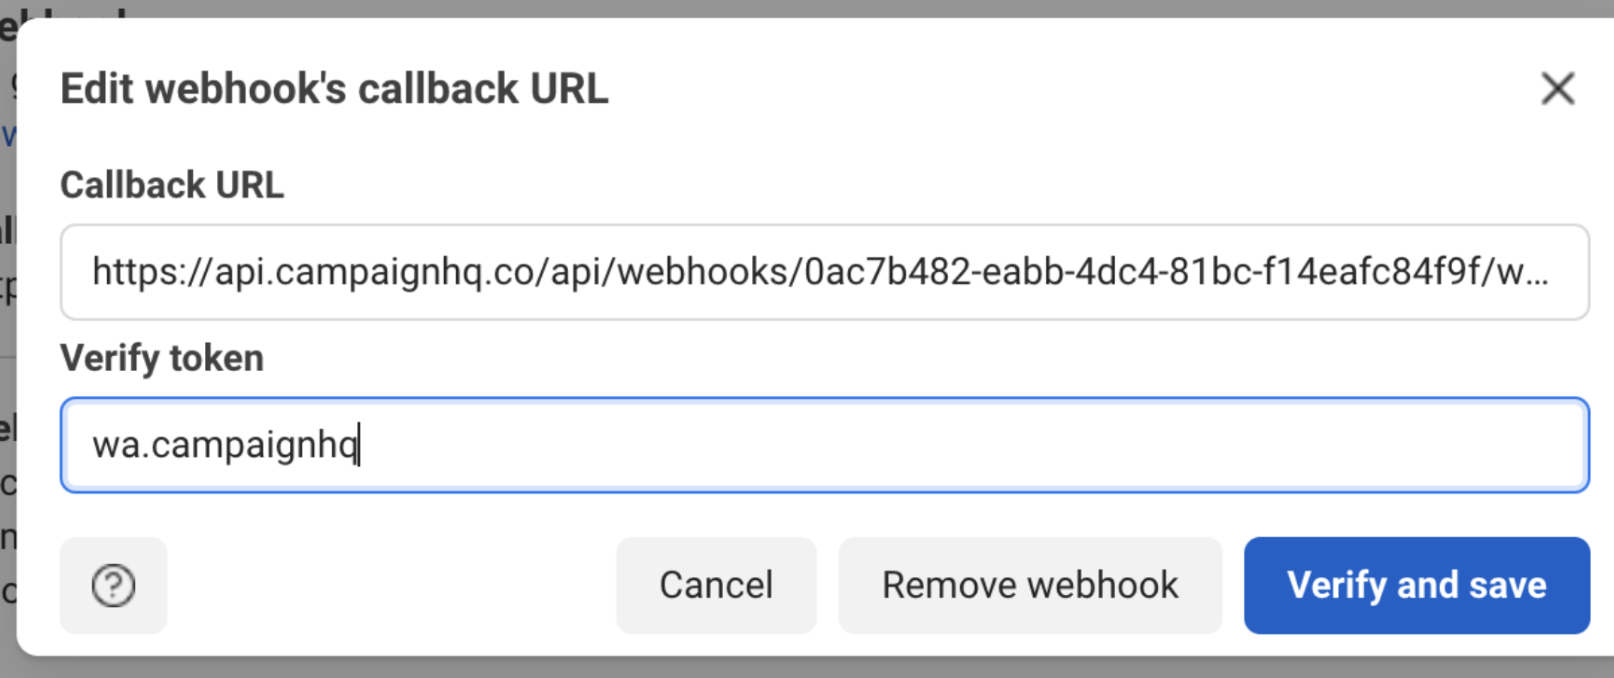
b. Go back to your CampaignHQ integrations page click on Edit and copy the Callback Url and Verify token and paste it. Then click on Verify and Save

c. Now click on the Manage button and subscribe to all the webhook fields

Step 4. Generate Permanent Access Token
a. Go to App Dashboard and click on “Business settings”

b. Click on System Users. Click on “Add”. Accept the terms. Then add a system name. Select the role as “Admin” then click on “Create System User”.


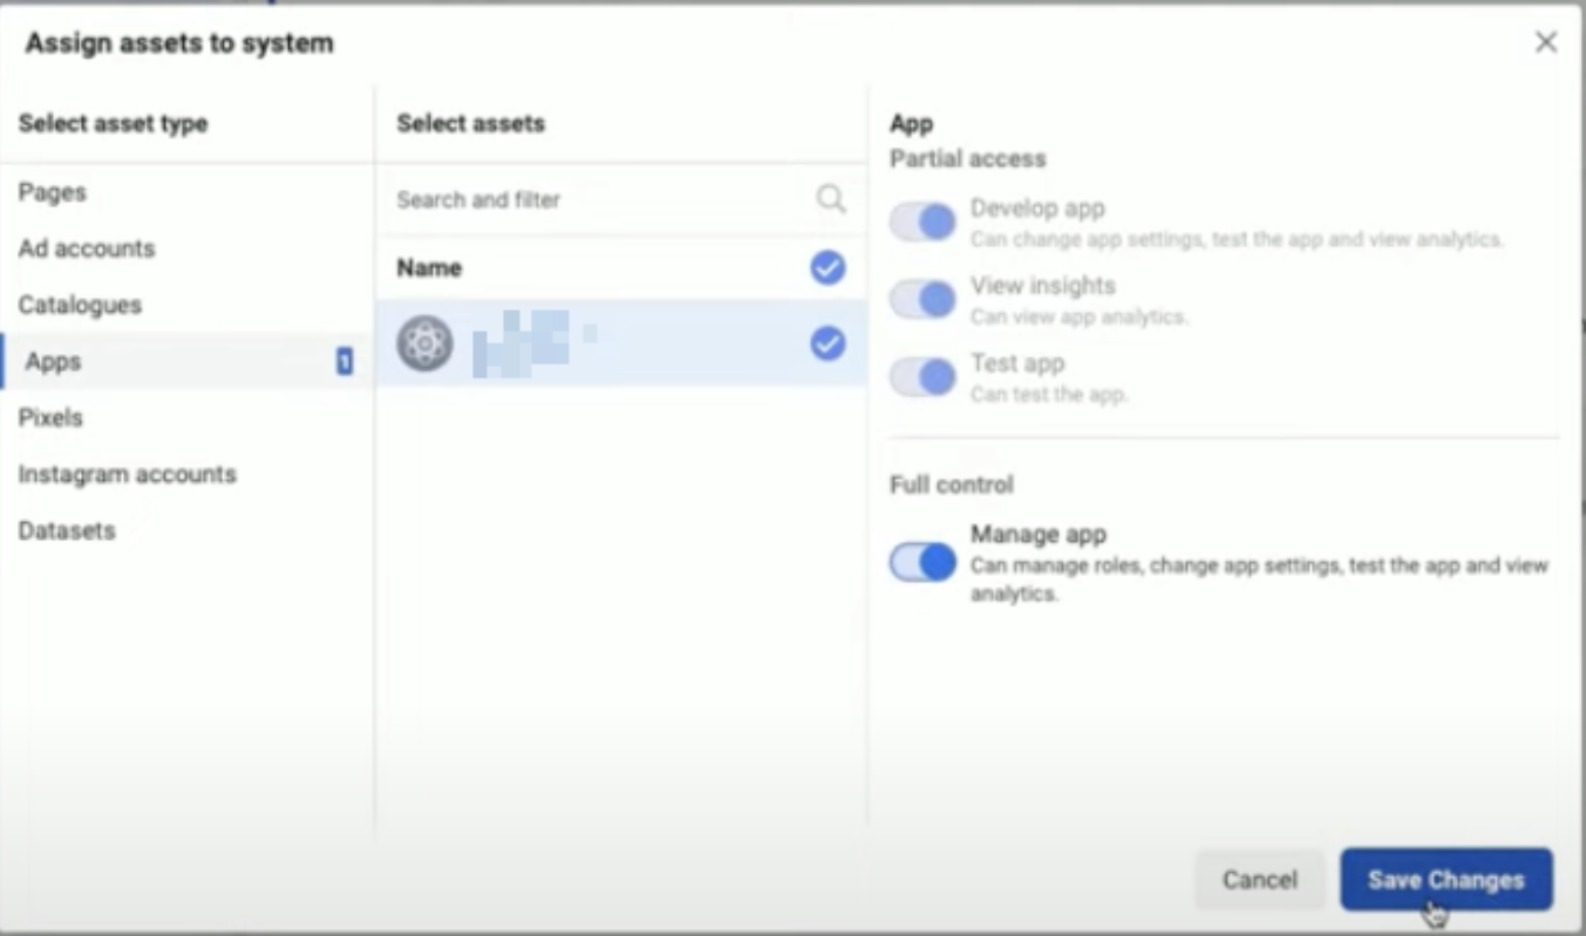
c. Then click on the “Add Assets” button on the top. Go to Apps. Select the App that you created and click on “Manage app”. Then “Save Changes”.
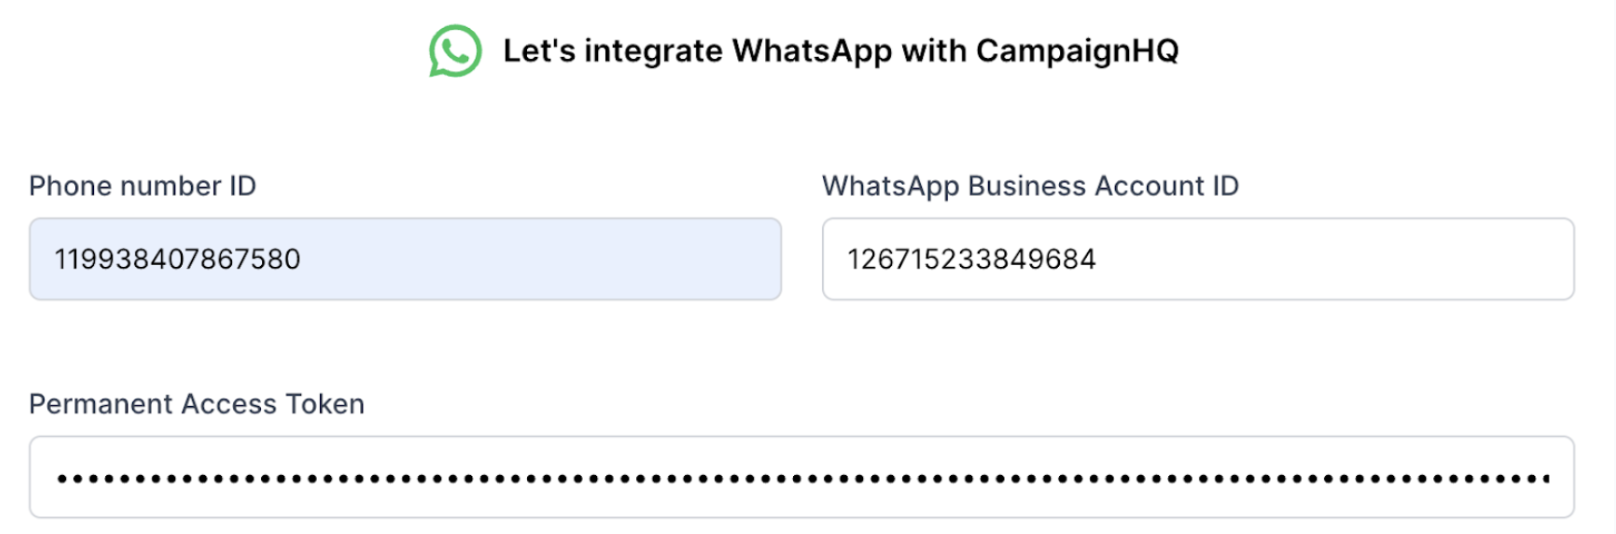
d. Now click on the “Generate New Token” button. Select your App. Select “Never” as the Token expiration. Scroll down and select “whatsapp_business_messaging” and “whatsapp_business_management”. Then click on “Generate token”. Copy the token and paste it into the CampaignHQ integrations page.


Step 5. Add payment method
a. Go back to business settings. Then go to Whatsapp accounts, then click on Settings and Payment settings.
b. There, click on the “Add payment method” button. Select country, currency and timezone and click “Next”. Then add your card details and click “Save”
c. Then put the business details and click “Save”
Step 6. Change App Mode to Live
a. Toggle the App mode button to Live. Then click on Basic Settings.
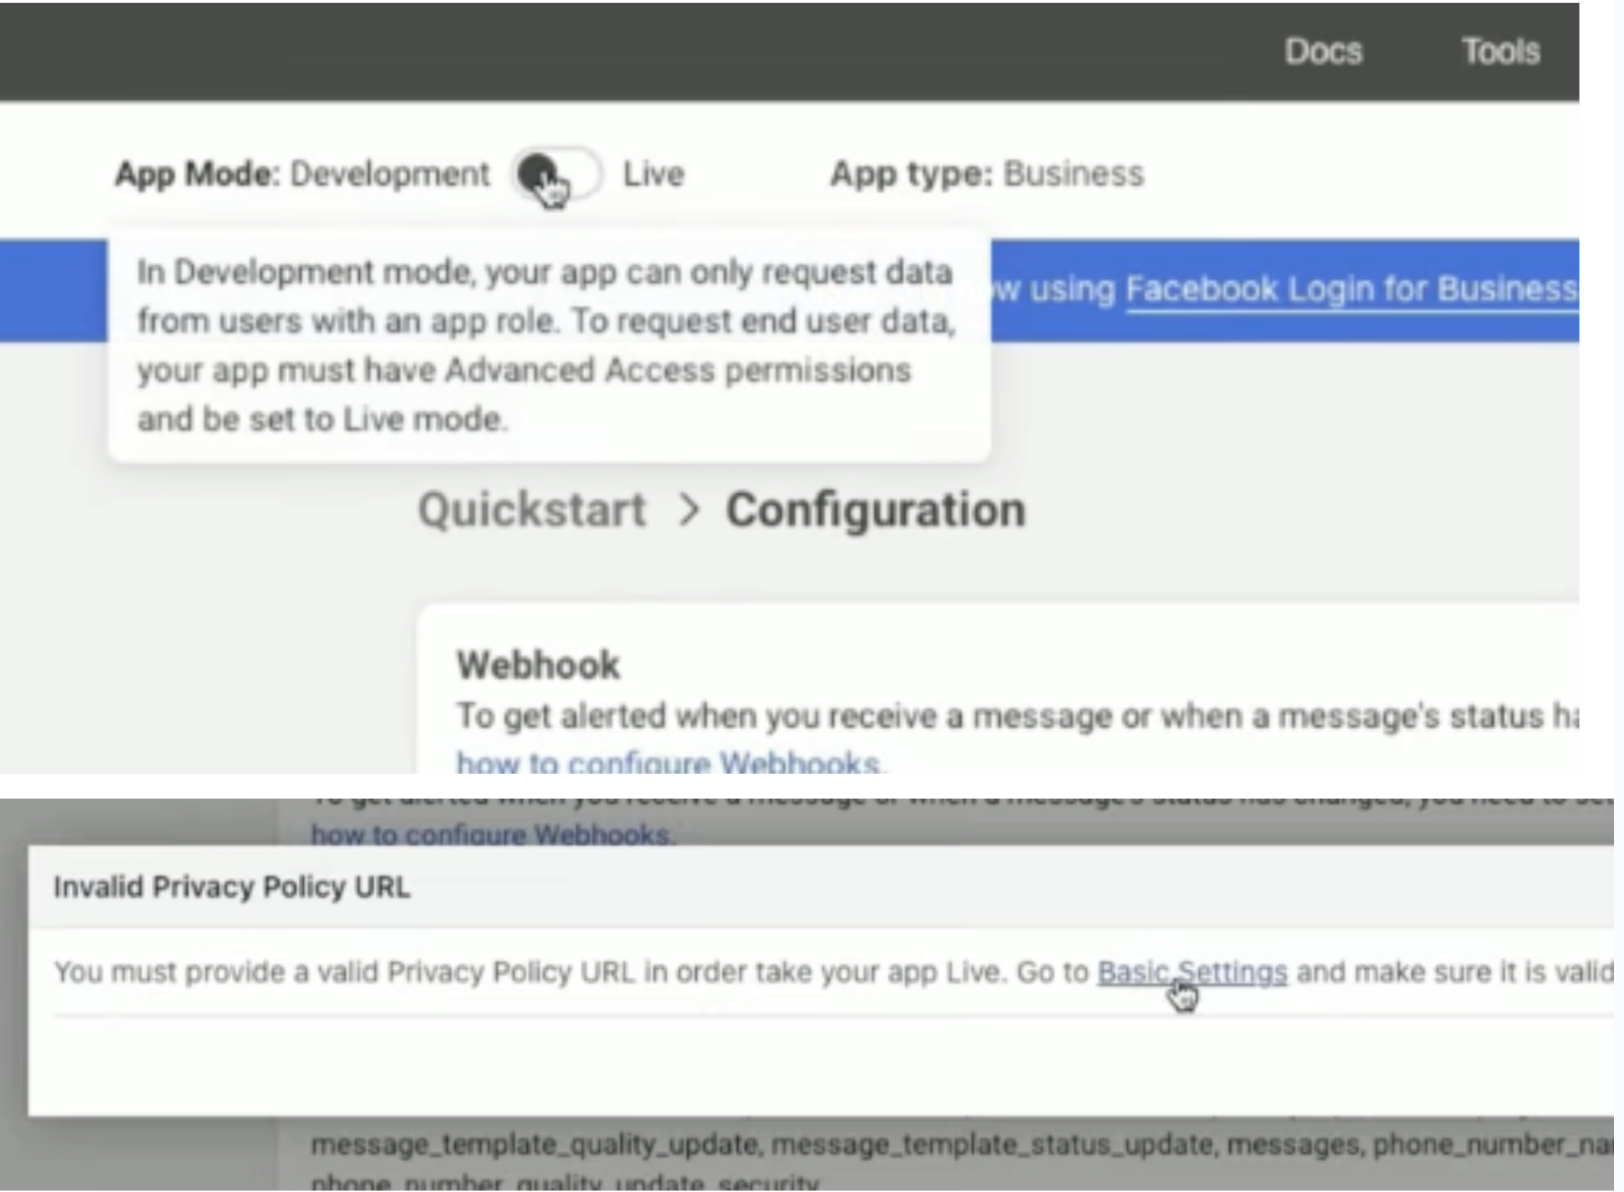
b. Here you enter the privacy policy link and click on save changes
c. Then click on the toggle again.
Step 7. Save and validate credentials
a. Go to the API setup page
Make sure your from number is selected
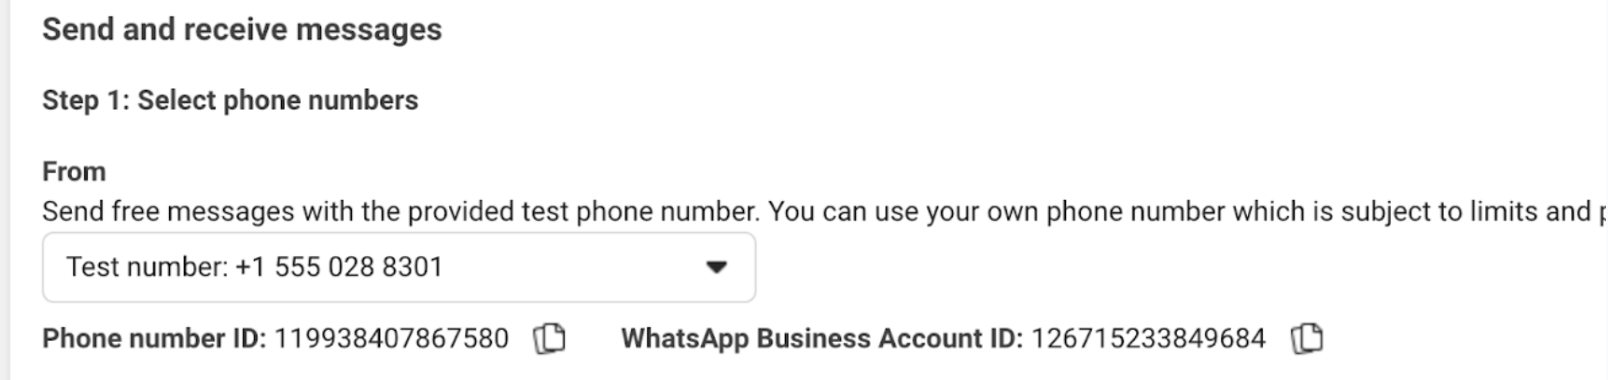
c. Then copy the Phone number ID and WhatsApp business account ID and paste in CampaignHQ integrations page. Then click on Save & Validate.
Now you can start using CampaignHQ to send campaigns.
Dive into success today!Get started with our 7 days free trial
Send emails and whatsapp messages to your customers with ease and at a fraction of the cost.